


How to Use a Wax Heater: A Step-by-Step Guide for 2026

Achieving salon-quality hair removal at home or running a smooth, efficient esthetician clinic goes beyond just having top-quality wax. You need to truly understand your equipment. If you're asking, “How do I use a wax heater?”, you're in the right place.
In 2026, modern wax warmers have become more advanced, equipped with digital sensors and rapid-heating elements. These improvements speed up the process but also require precise handling to prevent any skin irritation or burns.
Whether you’re a beauty professional growing your business or a newbie aiming to say goodbye to razors, this guide will take you through everything—like melting hard wax beans to the perfect consistency and cleaning up after your waxing session. Let’s dive in!
What is a Wax Heater and How Does It Work?
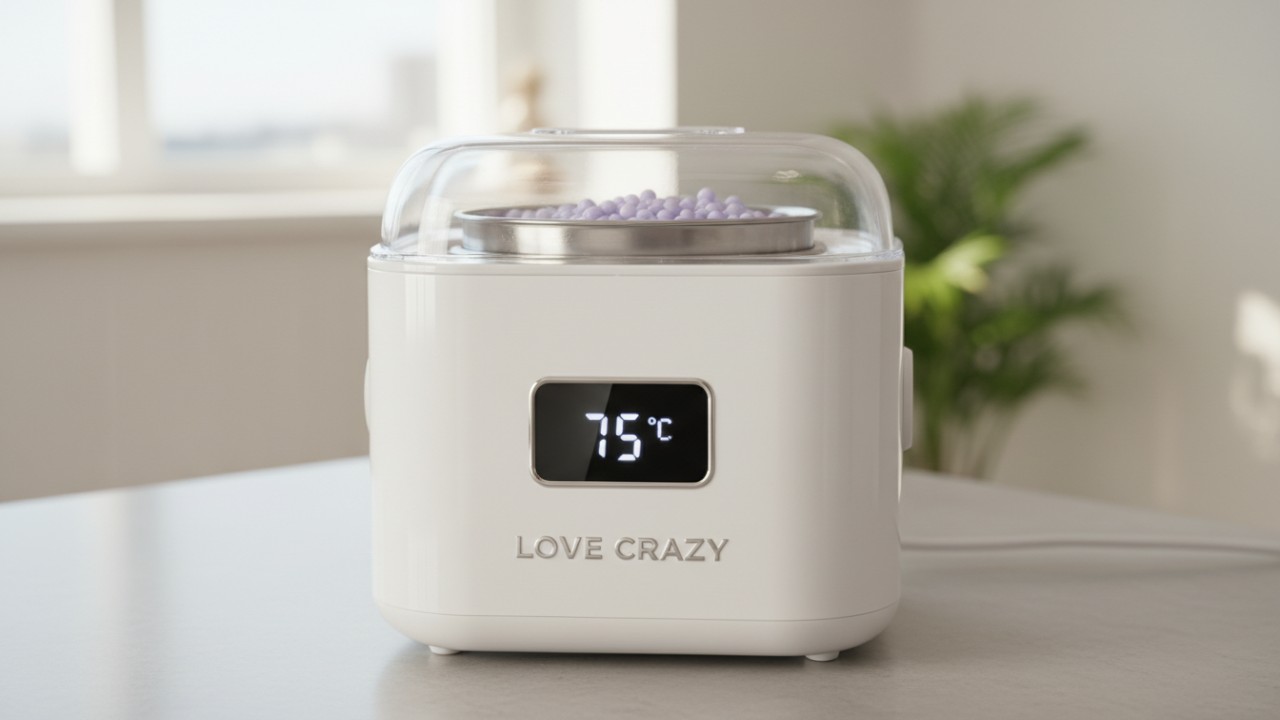
A wax heater is an electric device designed to safely melt depilatory wax and keep it at the right temperature for smooth hair removal. Using a calibrated thermostat, it turns solid wax into a soft, pliable form, making sure it's just hot enough to grip the hair without burning your skin.
Inside, it has a heating element, an aluminum pot, and a temperature control dial (or digital screen). The device warms up, and thanks to a smart thermostat, it cycles the heat on and off, ensuring the wax never gets too hot. Whether you're working with hard wax beads or traditional soft wax, the heater acts as the key to smooth, flawless skin.
Quick Summary: Key Takeaways for Flawless Waxing
For flawless results, you need a little preparation. Here’s a quick breakdown of the non-negotiables for using your wax heater effectively:
- Preparation is crucial: Clean your skin to remove oils and make sure the heater is placed on a stable, heat-resistant surface.
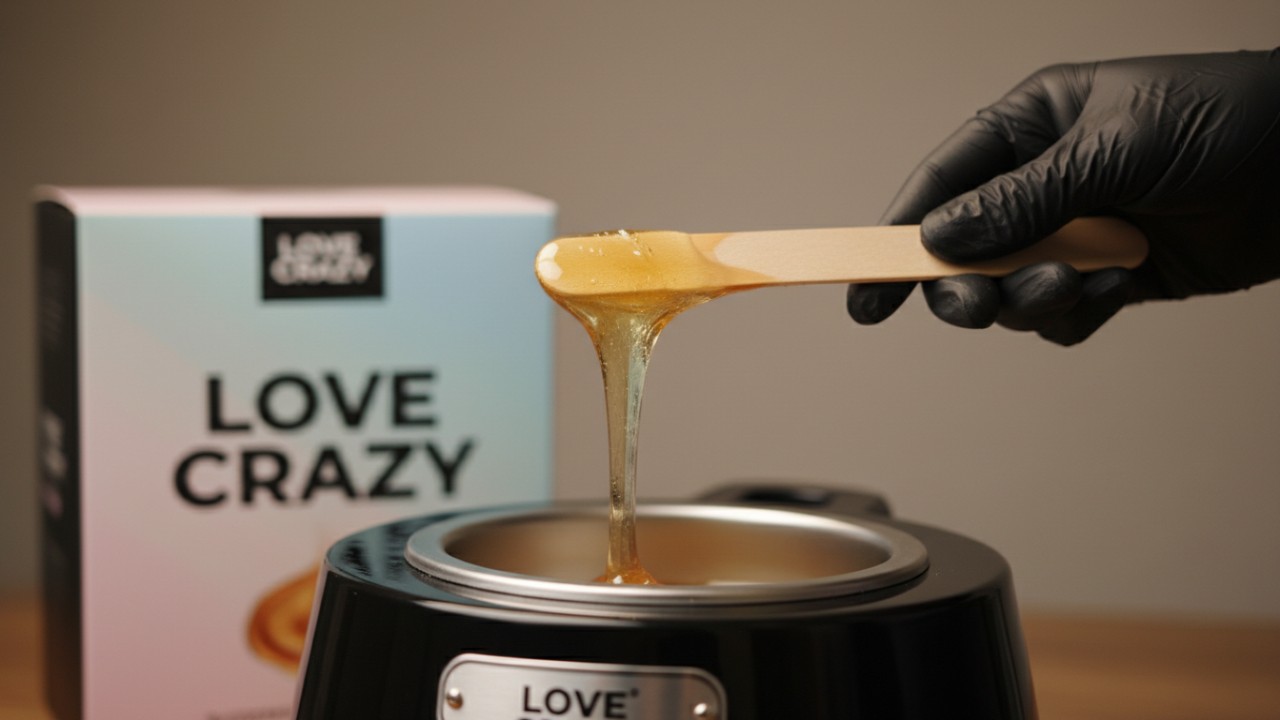
- Consistency check: The wax should be smooth and honey-like. If it’s too runny, it’s too hot and could burn your skin.
- Quality matters: Use certified, high-quality equipment to ensure safe and precise temperature control.
- Test before applying: Always do a patch test on your inner wrist to check the temperature before applying to larger areas.
Preparation: Choosing Your Wax and Setting Up
Before you even turn on the wax heater, proper setup is essential:
- Choose the right wax: Hard wax is great for sensitive areas like the bikini line, underarms, and face. It adheres only to the hair, not the skin, making it perfect for delicate spots. Soft wax (in cans) is better for large areas like legs and arms.
- Set up your station: Place the heater on a flat, clutter-free surface, away from water sources to avoid electrical hazards.
- Use a protective collar: Put a collar ring around the pot to catch any wax drips. This little step saves you from hours of cleanup afterward.
- Load the wax: Pour your desired amount of hard wax beads into the pot. If using soft wax, simply place the whole can into the heater.
How to Use a Wax Heater: A Step-by-Step Guide
Now, let's walk through the exact steps for using your wax heater like a pro:
- Start the melting process: Plug in the heater and turn the dial or setting to the highest temperature. This will help the wax melt faster, typically in 15 to 30 minutes.
- Stir occasionally: Use a wooden spatula to stir the wax from time to time. This ensures even heat and breaks up any stubborn lumps in the center.
- Lower to maintenance temperature: When the wax is nearly melted with a few small chunks left, reduce the heat to the "maintenance" setting (around 60°C to 70°C).
- Test the texture: Let the wax cool slightly until it reaches the perfect consistency. It should flow like thick honey. If it drips like water, it’s too hot.
- Do a patch test: Dip your spatula into the wax and apply a small amount to your inner wrist. It should feel comfortably warm, not scalding.
- Apply and remove the wax: Apply the wax in the direction of hair growth. Let it set (if using hard wax), pull the skin taut, and remove it quickly in the opposite direction of hair growth.
Common Mistakes and Expert Tips for Safe Hair Removal
Avoiding common mistakes can make all the difference when it comes to waxing safely. Here’s a list of some common errors and how to fix them:
| Common Mistake | Visual/Physical Sign | Consequence | Expert Fix |
|---|---|---|---|
| Applying wax too hot | Watery, thin consistency | Severe skin burns, tearing, and hyperpigmentation | Wait for a thick, honey-like texture before application |
| Overfilling the pot | Wax sits near the very brim | Dangerous spills when stirring or moving the device | Fill the inner aluminum pot only 3/4 full |
| Skipping the patch test | N/A | Unexpected allergic reaction or thermal burn | Always test a small amount on the inner wrist first |
| Leaving device unattended | Overheated, smoking, or bubbling wax | Fire hazard and chemically ruined wax | Use auto-shutoff models or monitor your sessions closely |
Expert Tip: Protect Your Skin
Apply a light layer of pre-wax oil or baby powder to your skin. This creates a barrier, allowing the wax to adhere only to the hair and not the skin, reducing pain and redness.
Post-Waxing Care and Cleaning Your Wax Warmer
Once your session is complete, cleaning your wax heater properly is crucial for maintaining its longevity:
- Turn off and unplug: Always turn off and unplug the heater right after use.
- Don’t wait for the wax to harden: Clean it while the wax is still warm, but not too hot to touch.
- Use the right cleaning solution: Wipe down the pot with a paper towel soaked in wax cleaner, mineral oil, or baby oil to remove the residue.
- Avoid abrasive tools: Never use harsh sponges or steel wool—these can scratch the pot and damage its non-stick coating.
- Proper storage: Store the wax heater in a cool, dry place to prevent dust buildup and bacteria from sticking to leftover wax.
After you've cleaned your wax heater, you'll want to ensure you’ve chosen the best equipment for your next session. If you're looking to invest in high-quality waxing tools, take a look at The Complete Guide to Wax Heaters: Uses & Buying Tips. This guide provides expert advice on selecting the right wax heater for your needs, whether you're a professional or a beginner.
Conclusion
By mastering the art of using a wax heater, you can take your hair removal game to the next level—whether you’re doing it at home or in a professional setting. With the right preparation, attention to detail, and safety protocols, you’ll enjoy smooth, flawless skin every time. Don’t forget to invest in high-quality, certified equipment to ensure long-lasting results and a comfortable experience. With these tips, you’ll be able to get the perfect results every time, and keep your wax heater in great shape for years to come.
For more details on choosing the right waxing equipment, be sure to check out our Waxing Equipment Guide: Wax Heaters, Wax Beans & Kits Explained, where we dive into everything from the best wax heaters to wax beans and kits for your waxing needs.
FAQs About How to Use a Wax Heater: A Step-by-Step Guide
How long does it take for a wax heater to melt hard wax beans?
Most standard wax heaters take between 15 to 30 minutes to fully melt hard wax beans. The exact time depends on the volume of beans in the pot and the wattage of the device. Turning the dial to the highest setting initially helps speed up this process significantly.
What temperature should my wax heater be set to?
To melt the wax initially, set the heater to its highest temperature (often around 100°C to 120°C). For application, the maintenance temperature should be lowered to around 60°C to 70°C. Always aim for a thick, honey-like consistency rather than relying solely on a specific number on the dial.
Can I leave my wax heater on all day?
Professional-grade wax heaters used in salons are designed to remain on throughout the workday. However, home-use devices should not be left unattended for extended periods. If leaving it on, ensure it has an auto-thermostat feature that cycles the heat to prevent burning the wax and creating a fire hazard.
How do I clean leftover wax from the warming pot?
Turn off the heater and let the wax cool until it is just warm. Use a paper towel saturated with mineral oil, baby oil, or a specialized wax cleaner to wipe the pot clean. Never use water or sharp metal objects to scrape the wax out, as this will damage the heating chamber.
Why is my melted wax stringy or too thick?
Stringy or excessively thick wax usually means the temperature is too low. It hasn't melted completely or the maintenance heat is insufficient to keep it pliable. Turn the dial up slightly and stir continuously with a wooden spatula until the strings disappear and the texture smooths out.
Can you put soft wax tins directly into the heater?
Yes, most standard 400ml or 800ml wax heaters are designed to hold standard soft wax cans directly. Simply remove the plastic lid from the tin and place the metal can into the heating chamber. Do not pour soft wax directly into the heating chamber without its tin or an inner aluminum pot.
How often should a salon replace their wax heating equipment?
High-quality commercial heaters can last 3 to 5 years with proper daily cleaning and maintenance. If the thermostat becomes inaccurate, the heating is uneven, or cords show wear, it is time for a replacement. Upgrading to models with modern digital sensors ensures consistent client safety.
What makes LOVE CRAZY wax heaters safe for home and professional use?
LOVE CRAZY wax heaters are manufactured in an ISO 9001:2015 certified facility. They undergo rigorous testing and carry CE, RoHS, and FCC international safety certifications. They feature advanced, high-precision temperature controls to prevent overheating and electrical hazards, making them a top choice globally.
FAQ
DMJ-141
What drill bits are compatible with DMJ-141?
-
It fits all standard 3/32" shank nail drill bits on the global market.
DMJ-140
Is the nail drill rechargeable and cordless?
Yes, it is a rechargeable cordless model with a built-in battery, supporting wireless use for on-the-go nail services.
AX-911
What is the MOQ for AX-911 bulk orders?
The MOQ is 100 unit.
F10
How to clean the F10 after use?
After the device cools down, you can either wipe the non-stick inner pot with a damp cloth or peel off the solidified wax. The detachable parts can be cleaned separately for more thorough hygiene.
AX-300
Do you offer B2B samples for AX-300, and what’s the sample policy?
Yes, paid samples are available; sample fees are refundable when bulk orders are placed.

Our AX-002 mini wax warmer combines compact portability with salon-grade performance, delivering salon-worthy hair removal results with zero fuss.
Its fast wax-melting system, precision temperature regulation, and hygienic single-use design guarantee smooth, long-lasting hair-free skin for targeted areas each use. Whether you’re a novice DIY user or a seasoned esthetician, it’s a hassle-free, dependable solution to upgrade your targeted hair removal process.
 - LOVE CRAZY")
Our AX-001 10ml Mini Wax Warmer Kit combines sleek, compact design with professional-grade waxing performance, delivering flawless precise hair removal for small, delicate areas. This all-in-one complete waxing set features a rapid heat-up system, steady temperature control, and a full range of premium waxing accessories, making it the perfect dependable solution for at-home beginners and professional estheticians alike. Achieve salon-worthy, long-lasting silky smooth skin with zero hassle, every single time.

Our waxing heater combines stylish design with professional performance, making salon-quality results effortless.
Its rapid heating technology, consistent temperature control, and skin-friendly formula ensure smooth, long-lasting hair removal every time. Whether you're a beginner or an experienced waxer, it's a quick and reliable way to transform your hair removal routine.

Our LOVECRAZY AX-110 550ml silicone wax heater blends safe, durable silicone material with reliable performance, making salon-quality multi-area hair removal effortless.
Its 30W fast heating, multi-wax compatibility (hard beads/blocks), 100-220V global voltage, and pink design suit salons, home users, and cross-border wholesale for face/eyebrows/body use.
As a premier wax heater manufacturer, LOVE CRAZY delivers top-tier OEM salon beauty equipment and custom manufacturing solutions for global B2B partners.
Contact us at
E-mail: david@lovecrazyhome.com
WhatsApp: +86 189 2777 9907
Tel: +86 0757-85626657/85626627
Address: 4F, Building B, No.18, Yiheng Road, Xiahengtian Industrial Zone,Lishui Town, Nanhai District, Foshan, Guangdong, China
 Scan QR Code
Facebook
Instagram
Instagram
Instagram